
Linux homedir encryption
Introduction
- Focal Fossa (20.04).
- Preview on Foss Linux.
- Get it at Ubuntu.com.
I recently decided to install Ubuntu Focal Fossa (currently in beta) and test it out. I use my computer(s) a lot – both home and professionally – and I enjoy getting new software installed. It is always exciting to discover new features (and bugs 😖 ) and see what’s been changed.
- Snapshots and clones. Useful for e.g. docker and system backups.
- Copy-on-write (making snapshots initially zero-cost).
- Raid.
- Encryption.
- SSD caching.
One of the new features in Focal Fossa is improved ZFS support; it is now possible to use it / enable it right from the installation of Ubuntu. Great ✋. I wanted to give it a go (looking forward to features such as built-in raid support and snapshots) but unfortunately it clashed a little bit with my wish to encrypt my home directory.
While this post is about home directory encryption in a setting of ZFS (and its built-in support of encryption), the general approach may also be of interest to you if you run ext4 and/or other disk encryption tools.
But Why?
Why would you want to encrypt your home directory? Do you have something to hide? Why go through the troubles?
Well… there are a couple of reasons why I chose to do it1And I am sure there are more…:
- I work as a consultant in IT and it is mandatory (for several reasons) for us to encrypt our data on-disk. E.g. Customer NDAs comes readily to mind.
- While we don’t have private key files for our net banking and government related sites any-more2But have a mobile app for it instead. Perhaps we should pay a bit of attention to security on those devices as well…!, I still have SSH-keys for technical accounts on the net, and for my personal server. And who knows what a skilled hacker could gather of personal information from my web browser cache!?!?
- If my laptop got stolen, I would also like to know that the thief could not readily browse through my personal data (mails, photos, documents, etc.). I believe it is similar to when burglars breaks in to homes: It is not a nice feeling to know that some random stranger has been rummaged through your personal belongings.
- Lastly: Why not? I’m a geek and it’s fun 🙂
Overview – What is the challenge?
The main challenge is two fold:
Ubuntu 20.04 did not provide an option to encrypt your home directory when using ZFS
Ubuntu did previously provide this option, but it used eCryptfs which was considered buggy, under-maintained, [and] not fit for main anymore and has thus been removed.
When enabling encryption manually (after installation) the decrypt action is performed before user login
The issue arises because ZFS is configured (on Ubuntu 20.04) to automatically mount all file systems on the system at boot time – including encrypted home directories. GDM has support for asking for passwords, and hence a prompt appears at boot time. This is great for system wide storage, but not so great for user directories.
PAM to the rescue
PAM is a authentication system that allows programs that rely on authentication to be written independent of the underlying authentication scheme. I.e. if GDM need to authenticate me as a user, it (GDM) can be agnostic about whether my password is in a file on the hard drive or is validated against an AD on the network.
PAM is the Pluggable Authentication Module system in *nix world. If you don’t know it, don’t worry. Neither do I. It is a complex system and I have not had the time (or urge) to really dig in to it other than what I needed here:
We can use PAM to get a hold of the user password when logging in, and in turn use the password to unlock our home directory storage.
So… what we are going to do is:
- Migrate the home directory from an unencrypted home directory to an encrypted one.
- Write a small Bash script to assist us in unlocking our home directory.
- Set up PAM to use the Bash script.
- Configure properties (used in the unlock script) on our ZFS volume.
Warning – Here Be Monsters
This is the computer-nerdiest post I have written on this site up until now, so if you have not heard of ZFS before, nor are you considering encrypting your home directory, then I am surprised that you got this far in the text 😀
If you continue on this journey with me, then I will assume that you
- Know your way around your Linux system.
- Have the basic knowledge of ZFS (at least read the ZFS man page. Or skimmed it. Or… you know… have heard of it).
- Know your way around Bash scripting.
Here Be Monsters. Messing around your filesystem may lead to data loss. Do back up your data. Proceed at own risk.
Step 1: Migrating the data
It is not possible to encrypt an existing dataset (filesystem) in ZFS once it has been created. Instead one has to make a little (fairly straight-forward) dance to create a new dataset (encrypted right from the beginning) and then move the data.
The command snippets below are examples from my own system; remember that you need to adapt the paths as you go.
- Create a temporary admin user.
- Log out of your normal user and log in with the temporary admin user.
- Move the mount point of your normal user homedir:
sudo zfs set mountpoint=/home/jvc_nonenc rpool/USERDATA/jvc_tdssc
Note, hererpool/USERDATA/jvc_tdsscis the existing un-encrypted dataset for my home directory, created by the Ubuntu installation. - Really important: Set the property
com.ubuntu.zsys:bootfs-datasetsas follows:VAL=$(zfs get com.ubuntu.zsys:bootfs-datasets rpool/USERDATA/jvc_tdssc -H -ovalue)
sudo zfs set com.ubuntu.zsys:bootfs-datasets=$VAL rpool/USERDATA/jvc_enc
As described in the Addendum section below, I originally thought this was only needed for automatic snapshotting, but it turns out, omitting this can lead to filesystem deletion! - Creat a new encrypted home directory:
sudo zfs create -o encryption=aes-256-gcm -o keyformat=passphrase -o keylocation=prompt rpool/USERDATA/jvc_enc -o mountpoint=/home/jvc
Important: Use your normal user password for this encryption, otherwise you won’t be able to decrypt the storage automatically when you log in. - Set ownership of new home directory:
sudo chown jvc:jvc /home/jvc - Copy data from old home directory to new:
sudo -u jvc rsync -ar /home/jvc_noenc/ /home/jvc/ - Make a mental note to clean up (remove) the temporary user and old home directory when all is set and done.
I did the dance and rebooted my computer, and got (as expected) this:
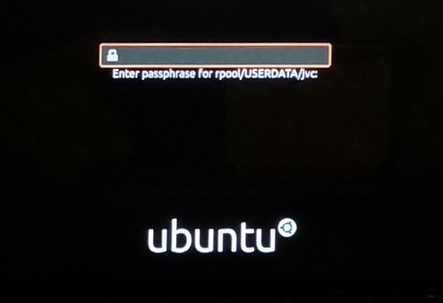
So yes, my home directory was encrypted. Great. But as expected, I now have to enter my password twice: Once during boot for unlocking the storage, and then once more for logging in to the system. This is an issue for me in two ways:
- I just dislike having to enter my password twice.
- If my girlfriend should use my computer, then she would not be able to do so without me entering my password at boot time.
Fair enough… most of the time I don’t shut down my computer but only suspends it (like everyone else)… but still…
Step 2: Writing the unlock-mount script
I will just show the script I use here. Assuming that you know how to read Bash, the content is fairly clear (and comments are provided in the code). The properties canmount and dk.talldanestale.automount:user will be explained in step 4.
Save the script to /sbin/mount-zfs-homedir and remember to set the executable bit:
#!/bin/bash
set -eu
# Password is given to us via stdin, save it in a variable for later
PASS=$(cat -)
# List all zfs volumes, listing the *local* value of the property canmount.
zfs get canmount -s local -H -o name,value | while read volname canmount; do
# Filter on canmount == 'noauto'. Filesystems marked 'noauto' can be mounted,
# but is not done so automatically during boot.
[[ $canmount = 'noauto' ]] || continue
# Filter on user property dk.talldanestale.automount:user. It should match
# the user that we are logging in as ($PAM_USER)
user=$(zfs get dk.talldanestale.automount:user -s local -H -o value $volname)
[[ $user = $PAM_USER ]] || continue
# Unlock and mount the volume
zfs load-key "$volname" <<< "$PASS" || continue
zfs mount "$volname" || true # ignore erros
done
Debug tip: You can change set -eu to set -eux to make Bash print out all commands as it is executing the script. In order to see the output, you also need to enable debug output in PAM. See next step.
Note: The use of here-string (the <<< operator) instead of echo "$PASS" | ... prevents your password from being written to the log.
Step 3: Set up PAM to use the Bash script.
The approach is to use the PAM module pam_exec.so to pass on the user password to an unlock-script.
The PAM configuration is a set of files residing in /etc/pam.d/. Some files are service specific3i.e. named after the service it is relevant to while others are shared (included) by the other files. On my Ubuntu system there is a file named /etc/pam.d/common-auth that is included from other services that enable users to login4console login, gdm, ssh etc.. This is the place to add the pam_exec.so hook:
- Edit the file
/etc/pam.d/common-auth: - Add the line:
auth optional pam_exec.so expose_authtok /sbin/mount-zfs-homedirThis line can be read as:
- Set up a hook for user authentication (
auth) … - that is allowed to fail (
optional) … - to run a command (
pam_exec) … - that exposes the password through stdin (
expose_authtok). - The command to run is
mount-zfs-homedir.
That is it for PAM configuration.
Debug tip: If you need to debug things, then adding debug log=/tmp/file.log will help you. Example:auth optional pam_exec.so expose_authtok debug log=/tmp/file.log /sbin/mount-zfs-homedir
Step 4: Configure properties on our ZFS volume.
The unlock script used two properties, which we will explain and configure here:
Property canmount
The first (substantial) line of the script lists datasets in the zfs pool along with the canmount property. We filter on values noauto. The noauto value indicates to the system that it should not be auto-mounted during boot (which is the trigger for the password prompt at boot).
In other words: We need to mark our home directory not to be auto-mounted at boot:
sudo zfs set canmount=noauto rpool/USERDATA/jvc_enc
Property dk.talldanestale.automount:user
Next, the script is filtering on a custom property dk.talldanestale.automount:user which I use to indicate to which user this dataset (filesystem) belongs. I do not want to attempt to mount my girlfriend’s home directory using my password.
The property is one I created. The ZFS states that user properties must contain a ‘:’, but otherwise is free to choose. I like the concept of prepending (semi) global properties with organization identifier. Hence the dk.talldanestale.
To set the property, execute:
sudo zfs set dk.talldanestale.automount:user=jvc rpool/USERDATA/jvc_encThat’s it. I hope it helps you on your journey.
Addendum: zsys automatic snapshots
One of the really nice features of ZFS is the snapshot feature. It enables you to, well, take a snapshot on the fly of the filesystem for later use. Later use could be…
- mounting (read-only) for retrieving lost files.
- rolling back system after a failed upgrade or install of a driver.
- a precautionary backup when you are about to perform actions that could potentially result in data loss.
On Ubuntu there is a hook set up in the apt/dpkg configuration that (via zsys) creates a snapshot of the machine just before installing packages. Unfortunately something broke when I created my new home directory and now I would get the error Couldn't find any association for the user dataset ....
Not knowing anything about zsys or how this was set up on Ubuntu I went spelunking and found the property com.ubuntu.zsys:bootfs-datasets that was set on my old home dataset but (of course) not on my new. So… copying this property fixed the issue:
VAL=$(zfs get com.ubuntu.zsys:bootfs-datasets rpool/USERDATA/jvc_tdssc -H -ovalue)
sudo zfs set com.ubuntu.zsys:bootfs-datasets=$VAL rpool/USERDATA/jvc_enc
All done. Hope it helped you as well 🙂
Update March 2021
It turns out that this step (setting com.ubuntu.zsys:bootfs-datasets) is not needed only for snapshotting your new home directory, but also to prevent zsys from deleting it – as happened to Mikhail in the comments below.
It turns out that:
zsysconsiders the namespaceUSERDATAto be theirs.- If a dataset is in that namespace, it will try to manage it.
- Managing means e.g. taking automatic snapshots of it, but it also means deleting “left over” data sets.
- If a dataset is in namespace
USERDATAbut does not have the propertycom.ubuntu.zsys:bootfs-datasets, thenzsysconsiders it eligible for deletion!
Mikhail filed a bug report to the zsys project. My stance is that it (zsys) should never delete a filesystem unless they are absolute sure that they created it and it is no longer needed. For instance, they could tag a dataset with a zsys-named property (not just namespace USERDATA) and only manage / delete those datasets. Deleting a filesystem on the basis of a missing property is (imho) a bug.
In other words:
- Remember to tag the new dataset!
- If you don’t want it to be managed (i.e. automatic snapshots), choose another namespace than
USERDATA.
Hey there,
I just redid the steps, as you described it, and would like to mention, that in my setup i used a different (actually two mirrored disks) as home. I had to add a ‘#’ to the first line of the script. Otherwise its not going to run. You might want to add that! Otherwise thanks a lot!
Yep, sorry. Copy-paste error. Thank you 🙂
Hi,
works great, saved me from messing around with PAM myself, thanks.
But Georg is right: the shebang in your script is missing a #
Reinhard
Yep, sorry. Copy-paste error. 😮
Great stuff! I was able to duplicate this on Manjaro with a few minor modifications. I can finally ditch ecryptfs and its archaic file name limitations.
Nice write-up!
BTW, you can eliminate the awk use by changing the read line to this:
while read volname canmount; do
Nice. Didn’t know that feature of
read. Thank you for sharing 🙂thank you very much for sharing. Helps a lot.
My problem is that something changes “noauto” property of my rpool/USERDATA/_enc zfs dataset to “on”. And thus breaks the script functionality. Digging this at the moment.
# zsysd boot-prepare -v
INFO Building new machines list
INFO Ensure boot on “rpool/ROOT/ubuntu_20.10”
INFO Switch dataset “rpool/USERDATA/_enc” to mount “on”
zsys-meta:modified-boot
it’s this guy switching noauto -> on. But how come other people have no problem with this?
I have not experienced this, sorry.
I upgraded my machine from 20.04 to 20.10 w/o problems. Did you install 20.10 from scratch? Maybe that gives rise to some (subtle) system setup differences.
Came over from the Archwiki!
Thanks a lot, finally ecryptfs is history for me!
Btw. I did a clean install of 20.10 and everything works just fine for me.
Strange. After day of work and reboot filesystem disappeared. Like something called “zfs destroy …”
Just found out that rpool/USERDATA is where zsys has to collect (garbage collect) to free up space any datasets unassociated to any system state manually. Using it for encrypted home filesystem doesn’t seem like a good idea. See https://github.com/ubuntu/zsys/issues/103 for details.
And the worst thing is that you’ll get your home filesystem garbage collected only when it will get filled above 80 percent.
Hi Mikhail,
Thank you for pointing it out. I have updated my guide with a warning about this.
I hope it is also OK I collated youur comments in to one 🙂
~Jørn
Hello,
Your job is awesome. However, something is not clear to me. Can you explain something regarding this context:
“sudo zfs set dk.talldanestale.automount:user=jvc rpool/USERDATA/jvc_enc”
What is the exact username: jvc or dk.talldanestale? And if one is the exact username then what is the other?
and what is this line supposed to do: “sudo zfs set dk.talldanestale.automount:user=jvc rpool/USERDATA/jvc_enc”
Thank you!
Hi Norbert,
What is the line supposed to do? It sets the property ‘dk.talldanestale.automount:user’ to value ‘jvc’ on the dataset ‘rpool/USERDATA/jvc_enc’. For further info you may take a look at ‘man zfs’.
The username is ‘jvc’ and should be *your* username on the system.
The property name I set is ‘dk.talldanestale.automount:user’. It could be anything except it *must* contain a colon (‘:’). The property is used in the script, so if you change the property name, you must also change it in the script.
~Jørn
I had some challenges getting it to work when logging in via SSH. A notable thing in this context is to set ChallengeResponseAuthentication to “yes” in sshd_config.
See also ArchWiki which adopted Jørn’s method to remote logins and described the process pretty well: https://wiki.archlinux.org/index.php/ZFS#Unlock_at_login_time:_PAM. .
Cool to see that my blog post made it to ArchWiki. I’ve never run Arch, but their wiki has more than once helped me out with troubles. Great site 🙂
Also note (for others) that logging in with SSH will require you to log in with password *first* time after boot. Subsequent logins may be done with SSH keys. The reason is, of course, that the first time you log in, your homedir is not mounted and thus SSHd cannot read your keys.
First off, your article is a fantastic resource and makes ZFS on Ubuntu more easily facilitated; so, well done.
I just had a quick question regarding your calling pam.d’s common-auth. On my ubuntu system (Ubuntu 20.04.2), common-auth is used for many processes outside of login; for example, when I run a fresh sudo apt update and my password is requested, this seems to run through the whole mount-zfs-homedir script even after the system is mounted (the /tmp/file.log journal suggests this).
To get around this, I call the mount-zfs-homedir within pam.d’s login and sshd. Referencing in two places is not as elegant, but at least only calls the script when mounting is necessary.
I just wanted to hear some of your thoughts on this.
Hi James,
Thank you for your insight. As I (jokingly) state above: I don’t really know PAM and thus did not think about sudo. But it makes sense.
I just poked around a bit, and it seems that what will happen on the sudo (assuming you are already logged in and filesystem is decrypted) is that the line
zfs load-key "$volname" <<< "$PASS" || continuewill fail and continue the loop. The message zfs spits out is "Key load error: Key already loaded for...".
Resource wise I think it does not matter to run this script with sudo. The question is: Is this a security issue.
Of the top of my head, I would say no. But of course, I may be mistaken, and adding the script explicitly in the PAM.d login and ssd configurations is perhaps more wise.
To be honest, I have recently become more aware of other security issues on my machine:
- Gain access to an unlocked desktop for a few seconds and you can install whatever script / apps in seconds (using usb keyboard emulators). Hence, I have become more adamant about locking my machine when leaving my desktop.
- If you can reboot a machine on a USB-stick, you can (with this configuration) install whatever you want on the system partition. Hence, for my work computer I opted for the full disk encryption.
- And if you really want to secure your system, you should also be locking down the boot process (BIOS + bpool/BOOT).
Just some things to bear in mind while choosing the security model that works for you :-)
Great article! Any suggestions for unmounting the home dir after logging out?
Hi there,
Again, PAM comes to (a partial) rescue. You can have it run a command on session end. Have a look at this answer https://unix.stackexchange.com/a/136552 .
However, when I write “partial” above, it is b/c you need to do a little scripting. You can be logged in multiple times, in which case you get the session end signal multiple times. Here you don’t want to lock your storage before all sessions have ended. You can perhaps use
whoorusersto check if you have logged completely out.However, there is another corner case. What if you started a process that lives on (and you want to live on), then you cannot pull the rug out under from that. Hence you may need to use
lsofto check if there are any processes currently holding any open files in your homedir.Have fun with it 🙂
~Jørn
For some reason the snapshots of the home directory don’t work on the newly created dataset, also I’m wondering probably not the case, but what happens when I change my user accounts password? Do I need to reencrypt the whole dataset?
Hi Wouter,
Not sure what you mean by “the snapshots of the home directory don’t work on the newly created dataset”. Manual snapshots should work (at least did for me) and automatic snapshots should be set up in the section “zsys automatic snapshots”.
And yes… if you change your user account password, then you would also need to re-encrypt your home directory. Alternatively you could change the login script so that it would have an encrypted keystore (locked with your new login password) from where it would then retrieve your old login password for your home directory.
Hello Jørn,
fantastic article. I just set up encrypted ZFS home dir on Ubuntu 22.04.
But, to get it fully complete, a dismount script on log out is missing.
Any idea how to realize this?
Thanks
Alex R.
Hi Alex,
Please see my answer above to the comment made 2021-09-02 by ‘me’.
Hi, thanks for this useful guide.
I’m trying to follow it, I guess that points 4 and 5 in Step 1 should be swapped, since first you need to create the dataset and then you may set the com.ubuntu.zsys[…] property.
Hi, thanks for this guide! Some minor suggestions:
* In Step 4, you should set another property: Tell zfs-mount-generator to ignore the home directories:
$ sudo zfs set org.openzfs.systemd:ignore=on
(see man zfs-mount-generator)
* In Step 2, your script should use the /usr/local/sbin/ directory.
In your script, this is not necessary (an leaks the password when using set -eux: PASS=$(cat -)
You can use straight /dev/stdin: zfs load-key “$volname” < /dev/stdin
* Finally, a solution to the unmount question asked above using systemd:
– create /etc/systemd/system/user@.service.d/mount_zfs.conf with content
———————
[Unit]
Requires=user-zfs-mount@%i.service
———————-
(The user@.service starts on first logon for every user and stops after last logout. We tell ’em to run our mount script.)
– create the aforementioned service file /etc/systemd/system/user-zfs-mount@.service containing
—————————————
[Unit]
Description=User ZFS mount /home/ for UID %i
After=dbus.service
StopWhenUnneeded=yes
IgnoreOnIsolate=yes
[Service]
ExecStart=/usr/local/sbin/mount-zfs-homedir2 start %i
ExecStop=/usr/local/sbin/mount-zfs-homedir2 stop %i
Type=oneshot
RemainAfterExit=yes
Slice=user-%i.slice
——————————-
– create the script /usr/local/sbin/mount-zfs-homedir2 with
———————————-
#!/bin/bash
set -e
# called from systemd via /etc/systemd/system/user-zfs-mount@.service
# to mount/unmount
# we get: $1 – start/stop, $2 – UID
# get username from UID passed to us by systemd
USERNAME=$(id -nu $2)
# gracefully exit if no such dataset exists
zfs list rpool/home/$USERNAME || exit 0
case $1 in
start)
# exit if already mounted
findmnt “/home/$USERNAME” && exit 0
# Mount homedir of user we are logging in as ($PAM_USER)
zfs mount “rpool/home/$USERNAME”
;;
stop)
zfs umount “rpool/home/$USERNAME”
zfs unload-key “rpool/home/$USERNAME”
;;
esac
———————————————-
– Finally, using systemd to mount and unmount, remove the line
—————–
zfs mount “$volname” || true # ignore erros
—————–
from mount-zfs-homedir
That’s it!
Best regards,
Christoph
Addendum: If your zfs dataset is not only your username (ubuntu-default), you need to add the detection-magic from mount-zfs-homedir to mount-zfs-homedir2 and use $volname instead of rpool/home/$USERNAME.
Thanks Jørn Christensen, Christoph Hagemann and other commenters!
I tried Christoph’s advice; unmounting (when all sessions logout) works great.
I implemented the “detection-magic” Christoph describes.
I’ve copied into a gist, where the formatting is a bit safer (beware the smart quotes in the comments above):
https://gist.github.com/Birch-san/ec0c765fc497ce0c36a4c3cbf2d2ff22
Regarding original article:
– has a typo (step 1.7 says `jvc_noenc`; should be `jvc_nonenc`).
– step 1.4 (setting `com.ubuntu.zsys:bootfs-datasets` on `jvc_enc`) is premature; you haven’t created `jvc_enc` yet. run step 1.5 (“Create a new encrypted home directory”) first, **then** run step 1.4.
Regarding Christoph’s comments:
– Clarification: `sudo zfs set org.openzfs.systemd:ignore=on` needs to specify an rpool. To follow the article’s example, this should be more like: `sudo zfs set org.openzfs.systemd:ignore=on rpool/USERDATA/jvc_enc`
– The advice to “load pass from stdin” is good, but I don’t believe it can be used in combination with the advice to “add detection-magic”, because that puts you into a loop (and you can’t read the same value from stdin multiple times).
I’ve changes
-s local
to
-s local,inherited
because I happend to have child datasets in my home directory (for different compression depending on the data).
actually the previous post is just the tip of the iceberg.
This is my script in use:
— SNIP —
#!/bin/bash
set -eu
# Password is given to us via stdin, save it in a variable for later
PASS=$(cat -)
# Runs as root only (prevents invocation on su & sudo)
[[ $(id -u) -ne 0 ]] && exit 0
# List all zfs volumes, listing the *local* value of the property canmount.
zfs get canmount -s local -H -o name,value | sort | while read volname canmount; do
# Filter on canmount == ‘noauto’. Filesystems marked ‘noauto’ can be mounted,
# but is not done so automatically during boot.
[[ ${canmount} != noauto ]] && continue
# Filter on user property eu.88x.automount:user. It should match
# the user that we are logging in as (${PAM_USER})
read user source <<<$(zfs get eu.88x.automount:user -H -o value,source ${volname})
[[ ${user} != ${PAM_USER} ]] && continue
# Load encryption key
if [[ ${source} = local ]]; then
zfs load-key ${volname} <<< "${PASS}" || true
fi
# Mount the volume
zfs mount ${volname} || true
done
— SNIP —